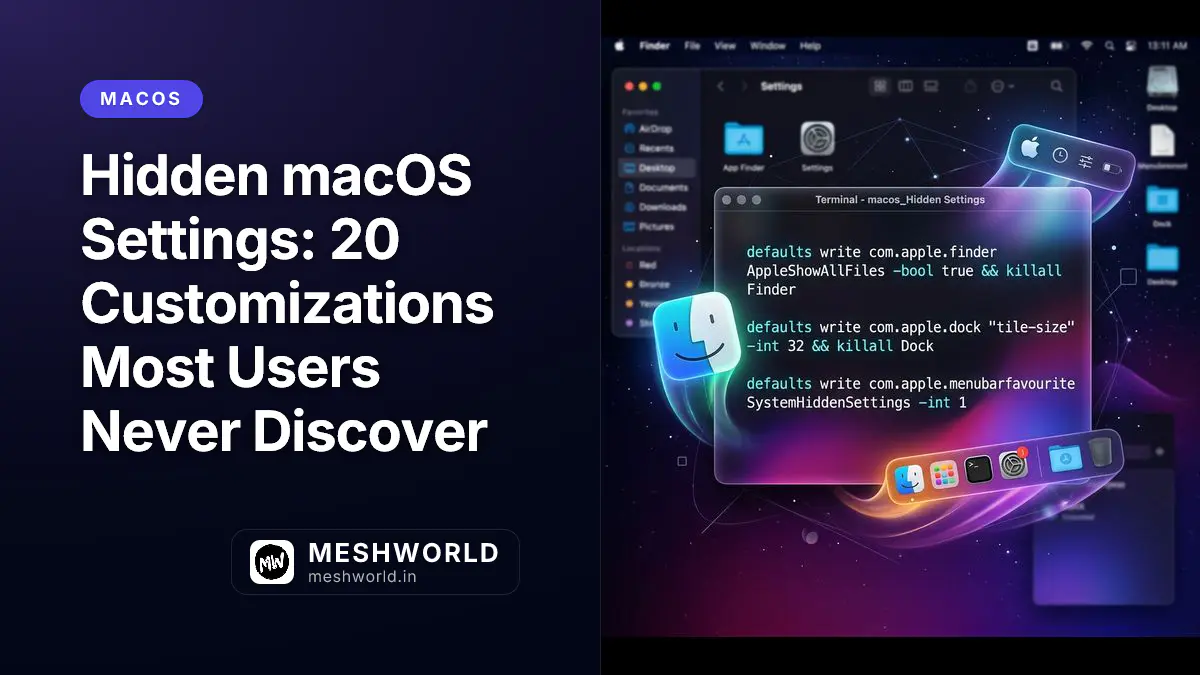
Your Mac, Your Way
macOS arrives configured for the average user. But you’re not average—you have specific workflows, preferences, and productivity patterns that the default settings don’t optimize for.
Hidden throughout System Settings, buried in context menus, and accessible only through Terminal are dozens of customizations that transform your Mac from a generic computer into a personalized productivity machine.
This guide reveals 20 customizations most users never discover. Some are cosmetic. Some are functional. All give you more control over your computing experience.
Dock Customization: Beyond the Basics
The Dock is your launchpad, your task switcher, and your window minimizer. Optimize it for your workflow.
Auto-Hide for Maximum Screen Space
Reclaim the bottom of your screen:
Via Settings:
- Open System Settings > Desktop & Dock
- Toggle “Automatically hide and show the Dock”
Via Keyboard:
⌘ + Option + Dtoggles auto-hide on/off instantly
Behavior:
- Dock slides away when not in use
- Move cursor to screen bottom to reveal
- Works in both standard and full-screen modes
Add the Applications Folder
Create a compact app launcher in your Dock:
- Open Finder
- In the sidebar, find Applications
- Drag the Applications folder to the right side of your Dock (next to Trash)
- Right-click the folder icon in Dock
- Select “View content as” > Grid (or List/Fan)
- Select “Sort by” > Name
Now you have:
- One-click access to all applications
- No need to open Launchpad or Finder
- Folder expands on click, showing all apps
Remove Unused Apps
A cluttered Dock slows you down. Remove what you don’t use:
- Drag any Dock icon up and out of the Dock
- It disappears with a “poof” animation
- The app remains installed—just removed from Dock
Keep in Dock:
- Daily drivers (browser, email, messages)
- Current project apps
- System utilities you access frequently
Remove from Dock:
- Apps used weekly or less
- Apps you launch via Spotlight
- Apps that auto-launch at startup anyway
Resize the Dock
Via Settings:
- System Settings > Desktop & Dock
- Adjust “Size” slider
Via Direct Manipulation:
- Drag the vertical divider line in Dock (between apps and folders)
- Left to enlarge, right to shrink
Pro tip: Smaller Dock = more app icons visible without scrolling (on smaller screens)
Magnification Effect
Make Dock icons expand when you hover:
- System Settings > Desktop & Dock
- Toggle “Magnification”
- Adjust slider to preferred size
Useful for identifying small icons quickly, especially on high-resolution displays.
Menu Bar: Clean and Focused
The menu bar at the top of your screen displays system status and controls. Customize it to show only what you need.
Control Center Customization
Choose which modules appear:
- Open System Settings > Control Center
- For each module, choose:
- Show in Menu Bar — Always visible
- Show When Active — Appears only when relevant
- Don’t Show — Hidden entirely
Recommended Setup:
| Module | Recommendation | Why |
|---|---|---|
| Wi-Fi | Show in Menu Bar | Quick network switching |
| Bluetooth | Show in Menu Bar | AirPods, peripherals |
| Battery | Show in Menu Bar | Monitor power (laptops) |
| Sound | Show in Menu Bar | Volume control |
| Screen Mirroring | Show When Active | Only when casting |
| Focus | Show When Active | Only when enabled |
| Siri | Don’t Show | Use voice or keyboard |
Hidden Menu Bar
Enable automatic hiding:
- System Settings > Desktop & Dock > Menu Bar
- Select “Automatically hide and show the menu bar”
- Choose “Always” or “In Full Screen Only”
Move cursor to the top of the screen to reveal.
Reorder Menu Bar Icons
Most menu bar icons can be reordered:
- Hold ⌘ (Command)
- Drag icons left or right
- Release to place
Exceptions: System icons (clock, Spotlight, Notification Center) are fixed.
Widget Customization: Information at a Glance
Widgets display information without opening apps. Customize your Notification Center to show what matters.
Adding and Removing Widgets
- Click date and time in menu bar (top-right)
- Notification Center slides out with widgets
- Click Edit Widgets at bottom
- Drag widgets to add/remove/rearrange
Recommended Widgets by Use Case
| User Type | Useful Widgets |
|---|---|
| Developer | GitHub, Jira, System Monitor, Battery |
| Business | Calendar, Reminders, Stocks, World Clock |
| Creative | Weather, Photos, Music, Battery |
| General | Weather, Calendar, Battery, Clock |
| Crypto | CoinTracker, stocks widgets |
| Remote worker | World Clock (multiple time zones), Weather |
Third-Party Widgets
Many apps include widgets:
- Fantastical — Advanced calendar
- Things — Task management
- Bear — Notes
- Dark Sky — Weather
- Battery Monitor — Detailed battery info
- CPU Suite — System monitoring
Sticky Notes: The Native Note-Taking App
Apple includes a simple but powerful note-taking app: Stickies.
Using Stickies
- Open Stickies (search via Spotlight
⌘ + Space) - ⌘ + N creates a new sticky note
- Type your note
- Double-click the title bar to collapse (minimize to just the title)
- Drag to position anywhere on screen
Formatting Stickies
| Shortcut | Action |
|---|---|
⌘ + + | Increase font size |
⌘ + - | Decrease font size |
⌘ + B | Bold |
⌘ + I | Italic |
⌘ + U | Underline |
⌘ + Shift + C | Show colors (change note color) |
Pro Workflows
During Calls:
- Create sticky for call notes
- Position beside video window
- Collapse when not needed, expand to reference
Daily Standups:
- Create sticky with “Yesterday/Today/Blockers” template
- Update throughout the day
- Reference during calls
Shopping Lists:
- Create sticky with list
- Keep on screen while browsing
- Delete items as you complete
Making Stickies Stay on Top
- Click the sticky note
- Window > Float on Top
- Note stays visible even when switching apps
Night Shift: Eye Comfort Scheduling
Night Shift reduces blue light emission in the evening, making screens easier on your eyes and potentially improving sleep.
Enabling Night Shift
-
System Settings > Displays > Night Shift
-
Schedule: Choose an option:
- Sunset to Sunrise — Automatic based on location
- Custom — Set your own hours
- Manual — Toggle on/off as needed
-
Color Temperature: Adjust warmth
- Less Warm (cooler, more blue)
- More Warm (warmer, more orange)
Finding Your Optimal Setting
Start conservative:
- Begin with Sunset to Sunrise
- Set temperature to middle position
- Adjust after a week based on comfort
Tip: The effect is subtle at first. After a week of use, turn it off temporarily—you’ll notice the harshness of standard blue light immediately.
When to Use/Not Use
| Situation | Recommendation |
|---|---|
| Evening browsing | ON — reduced eye strain |
| Photo/video editing | OFF — color accuracy matters |
| Design work | OFF — accurate colors essential |
| Reading long documents | ON — easier on eyes |
| Before bed | ON — supports sleep hygiene |
Text Replacement: System-Wide Shortcuts
Create shortcuts that expand into longer text across all applications.
Creating Text Replacements
- System Settings > Keyboard > Text Input
- Click Text Replacements
- Click + button
- Enter:
- Replace: Your shortcut (e.g.,
_email) - With: Full text (e.g.,
your.email@example.com)
- Replace: Your shortcut (e.g.,
Practical Examples
| Shortcut | Expands To | Use Case |
|---|---|---|
_email | Your email address | Form filling |
_phone | Your phone number | Contact forms |
_addr | Your full address | Shipping forms |
_name | Your full name | Registrations |
omw | ”On my way!” | Quick messages |
brb | ”Be right back” | Chat |
ttyl | ”Talk to you later” | Sign-offs |
_sig | Email signature | Professional emails |
Auto-Correction
Also in Text Replacements:
- Common typos automatically corrected
- Custom corrections you define
- Works across all apps with text input
Text replacements sync across all your Apple devices via iCloud. Create once, use everywhere.
Terminal Tweaks: Beyond the GUI
Some settings are only accessible via Terminal. These are safe, reversible, and powerful.
Increase Mouse Speed Beyond Default
System Preferences limits mouse speed. Bypass it:
Check current setting:
defaults read -g com.apple.mouse.scaling(Default is typically 3.0)
Increase speed:
defaults write -g com.apple.mouse.scaling 6.0Values to try:
4.0-5.0— Moderate increase6.0-7.0— Significant increase (good starting point)8.0-10.0— Very fast (large displays)
Apply change: Log out and back in, or restart.
Revert to default:
defaults write -g com.apple.mouse.scaling 3.0Show Hidden Files in Finder
Toggle hidden files:
⌘ + Shift + .(That’s Command + Shift + Period)
Hidden files (starting with .) become visible. Press again to hide.
Enable Quit for Finder
Finder normally stays running. Enable quitting:
defaults write com.apple.finder QuitMenuItem -bool true
killall Finder
Now Finder > Quit Finder (or ⌘ + Q) works.
Revert:
defaults write com.apple.finder QuitMenuItem -bool false
killall Finder
Change Screenshot Format
Screenshots save as PNG by default. Change to JPG for smaller files:
defaults write com.apple.screencapture type jpg
killall SystemUIServer
Options: jpg, png, gif, pdf, tiff
Revert to PNG:
defaults write com.apple.screencapture type png
killall SystemUIServer
Disable Screenshot Shadows
Remove window shadows from screenshots:
defaults write com.apple.screencapture disable-shadow -bool true
killall SystemUIServer
Revert (shadows on):
defaults write com.apple.screencapture disable-shadow -bool false
killall SystemUIServerThese commands are safe, but always: 1. Copy commands exactly (typos can have unintended effects) 2. Understand what each command does before running 3. Know how to revert changes (commands provided above)
Option Key Hidden Menus
The Option (⌥) key reveals alternate menu items throughout macOS.
Finder Examples
| Menu | Without Option | With Option |
|---|---|---|
| File > Close Window | Close front window | Close All (all Finder windows) |
| Window > Minimize | Minimize front window | Minimize All |
| File > Duplicate | Duplicate file | Duplicate Exactly (preserves metadata) |
System Menu Bar Examples
| Icon | Click | Option + Click |
|---|---|---|
| Bluetooth | Toggle on/off | Device menu + signal strength |
| Wi-Fi | Toggle on/off | Network details + diagnostics |
| Volume | Adjust volume | Input device selection |
| Time | Date/time | Full date + calendar |
Menu Bar Sound Icon
Hold Option and click the Sound icon:
- Shows all input/output devices
- Select different speakers/headphones
- Change input source (microphone)
Close All Windows at Once
Have multiple windows open in an app? Close them all instantly.
The Option-Click Method
- Hold Option (⌥)
- Click the File menu
- Notice “Close Window” becomes “Close All”
- Click it
All windows of that app close simultaneously.
Keyboard Alternative
Some apps support:
⌘ + Option + W— Close all windows
Finder-Specific
In Finder:
- Hold Option
- Click File > Close All
- All Finder windows close
Or use:
Option + ⌘ + Wwhen Finder is active
Desktop & Screen Saver: Personalization
Your desktop background sets the tone for your workspace. Optimize it.
Dynamic Desktops
macOS includes wallpapers that change throughout the day:
- System Settings > Wallpaper
- Look for wallpapers labeled Dynamic
- Select one
The wallpaper automatically shifts from morning to afternoon to evening lighting.
Custom Photo Desktops
Use your own images:
- System Settings > Wallpaper
- Click + to add photos
- Or drag images from Finder into the wallpaper pane
Pro tip: Use subtle, low-contrast images for less distraction during work.
Screen Saver as Lock Screen
Configure what appears when your Mac locks:
- System Settings > Lock Screen
- Configure:
- Show large clock — Easy time reading
- Show user name and photo — Personalization
- Show password hint — For forgetful moments
Search Within Current Folder
By default, Finder searches your entire Mac. Limit it to current folder for faster results.
Changing Default Search Scope
- Open Finder
- Finder > Settings > Advanced (or
⌘ + ,) - Under “When performing a search:”
- Select “Search the current folder”
How It Works
| Search | Before | After |
|---|---|---|
| ”budget” in Documents | Searches entire Mac | Searches only Documents |
| Result | Slow, irrelevant | Fast, focused |
Expanding When Needed
Sometimes you want the full search:
- Perform search
- In results window, click Search: dropdown
- Select “This Mac” to expand scope
Trackpad & Mouse: Advanced Gestures
Trackpad Gestures
Enable in System Settings > Trackpad:
| Gesture | Enable For |
|---|---|
| Tap to click | No need to press down |
| Secondary click | Two-finger right-click |
| Three-finger drag | Drag windows without clicking |
| App Exposé | Swipe down to see all windows of current app |
Three-Finger Drag (Hidden Gem)
Move windows without pressing the trackpad:
- System Settings > Accessibility > Pointer Control > Trackpad Options
- Enable “Use trackpad for dragging”
- Select “Three finger drag”
Now hover three fingers on a window title bar and drag. Your fingers never press down.
Mouse Acceleration
Disable mouse acceleration for consistent cursor movement:
defaults write .GlobalPreferences com.apple.mouse.scaling -1(Use -1 to disable acceleration, or 0 to 3 for different curves)
Revert to default:
defaults delete .GlobalPreferences com.apple.mouse.scalingQuick Reference: Hidden Shortcuts
| Action | Shortcut/Command |
|---|---|
| Show hidden files | ⌘ + Shift + . |
| Dock auto-hide toggle | ⌘ + Option + D |
| Close all windows | Option + File > Close All |
| Menu bar icon reorder | ⌘ + drag |
| Extended menu options | Option + click menu |
| Screenshot window with shadow | ⌘ + Shift + 4, then Space |
| Screenshot window without shadow | ⌘ + Shift + 4, Space, Option + click |
| Emoji picker | ⌃ + ⌘ + Space |
Putting It All Together: Personalized Setup
Initial Setup Checklist:
- Enable Dock auto-hide (
⌘ + Option + D) - Add Applications folder to Dock
- Remove unused Dock apps
- Customize Menu Bar (Control Center settings)
- Add useful widgets (Calendar, Weather, Battery)
- Configure Night Shift (sunset to sunrise)
- Set up 3-5 text replacements (
_email,_addr, etc.) - Enable three-finger drag (Accessibility settings)
- Set Finder to search current folder
- Configure screenshot save location
Advanced Users:
- Increase mouse speed via Terminal
- Configure custom keyboard shortcuts
- Set up Hyper Key (Caps Lock remap)
- Enable hidden Finder quit option
Troubleshooting Common Issues
Dock Changes Not Sticking
- Some settings require
killall Dockin Terminal - Or simply log out and back in
Terminal Commands Don’t Work
- Ensure exact spelling (commands are case-sensitive)
- Check for extra spaces or missing quotes
- Some commands require admin privileges (use
sudocarefully)
Text Replacements Not Syncing
- Check iCloud is enabled on all devices
- Sign out/in of iCloud if stuck
- Ensure “Keyboard” sync is enabled in iCloud settings
Night Shift Schedule Wrong
- Verify location services are enabled
- Check time zone is correct
- Manually set custom schedule as fallback
Related Articles
Master every aspect of macOS:
- Keyboard Mastery on macOS — Master shortcuts and text snippets
- Master macOS Window Management — Split Screen, Stage Manager, and Hot Corners
- Finder Mastery: 15 Power User Tricks — Navigate files faster than ever
- The Connected Mac: iPhone Mirroring, Universal Control, and Continuity Camera — Use your Apple devices together seamlessly
- macOS Screenshot & Media Mastery — Capture, edit, and share visual content
Related Articles
Deepen your understanding with these curated continuations.

Terminal Basics for macOS: Essential Commands
Unlock the command line without fear. Learn essential Terminal commands, create aliases, customize your shell, and automate tasks that are impossible in the GUI.
Master Mission Control: Virtual Desktops and Space Management on macOS
Expand your workspace with virtual desktops. Learn to create Spaces, assign apps to specific desktops, and navigate between contexts with gestures and shortcuts.
Voice Control & Dictation: Hands-Free macOS Productivity
Control your Mac with your voice. Master dictation for fast text input and Voice Control for hands-free navigation and commands.