How to Fix Debian/Ubuntu Initramfs or Black Screen at Boot
You power on your Debian or Ubuntu machine, and instead of the usual login screen, you’re staring at a black screen with a cryptic (initramfs) prompt—or worse, just a blinking cursor. This is one of the most common boot failure modes on Linux, but the good news is that it’s usually fixable without reinstalling.
The initramfs (initial RAM filesystem) is a tiny, temporary environment loaded into memory at boot. Its job is to assemble enough of the system—load drivers, find storage devices, and mount the real root filesystem—to hand control over to the regular OS. When something interrupts that handoff, you land at the initramfs prompt. Think of it as the boot process raising its hand and saying, “I couldn’t finish—here’s what I had when things went wrong.”
Most of the time, the problem is a filesystem consistency check failure: the boot scripts try to mount your root partition, hit errors, and refuse to proceed for safety. Other times, the partition referenced in your boot configuration doesn’t exist or has changed identity (a UUID mismatch). Hardware issues—failing drives, loose cables, or controller timeouts—can also prevent the root filesystem from appearing at all.
This guide walks you through the safest path from “I’m at the initramfs prompt” to “my system boots again.” We’ll focus heavily on fsck (the filesystem check and repair utility), since it fixes the majority of cases, but we’ll also cover non-filesystem causes and recovery alternatives.
How do I fix the initramfs boot error in 60 seconds?
Most likely causes
A corrupted or inconsistent filesystem that fails the boot-time check, a wrong or stale UUID in your boot configuration pointing to the wrong partition, or a missing/unreachable root filesystem due to hardware or controller issues.
Safest first commands to identify your root partition
cat /proc/partitions
ls /dev/sd* /dev/nvme* 2>/dev/null
blkid
Use blkid output to match the UUID or filesystem type against what you expect for your root partition.
When to run fsck
If blkid shows your root partition exists and is an ext2/ext3/ext4 filesystem but the boot process dropped you into initramfs with filesystem error messages, run fsck on that partition (unmounted). This fixes most cases.
If fsck doesn’t fix it
Check whether the kernel boot parameter root=UUID=... matches the actual UUID returned by blkid. If they differ, the boot config is pointing to the wrong (or nonexistent) partition. You may need to boot from a live USB to repair GRUB or /etc/fstab.
What should I check before repairing initramfs?
Before running any repair commands, gather information. Rushing to fsck on the wrong partition can destroy data.
Identify your root partition and devices
At the initramfs prompt, list all block devices the kernel can see:
cat /proc/partitionsExpected results: A table listing device major/minor numbers, sizes in blocks, and partition names (e.g., sda1, sda2, nvme0n1p2, mmcblk0p1).
Then check what filesystem types and UUIDs are detected:
blkidExpected results: Lines like /dev/sda2: UUID="a1b2c3d4-..." TYPE="ext4" PARTUUID="...". Note the device path, UUID, and filesystem type for the partition you believe is your root (/).
Confirm filesystem type
From the blkid output, the TYPE= field tells you the filesystem (ext4, btrfs, xfs, etc.). This matters because fsck commands differ by filesystem type. This guide covers ext2/ext3/ext4 (the most common on Debian/Ubuntu). If your root is btrfs or xfs, the repair steps differ—consult the respective documentation.
Check if the root filesystem is already mounted
mount | grep -E 'on / (ro|rw)'Expected results: If a line shows the root device mounted as read-only (ro), the boot scripts may have partially progressed. If nothing appears, the root filesystem was never mounted—this is the typical initramfs scenario and means fsck can be run safely on the unmounted partition.
Note: In some initramfs environments, you may need to check with just mount since the BusyBox version may have different output formatting.
How do I rescue a Linux system from the initramfs prompt?
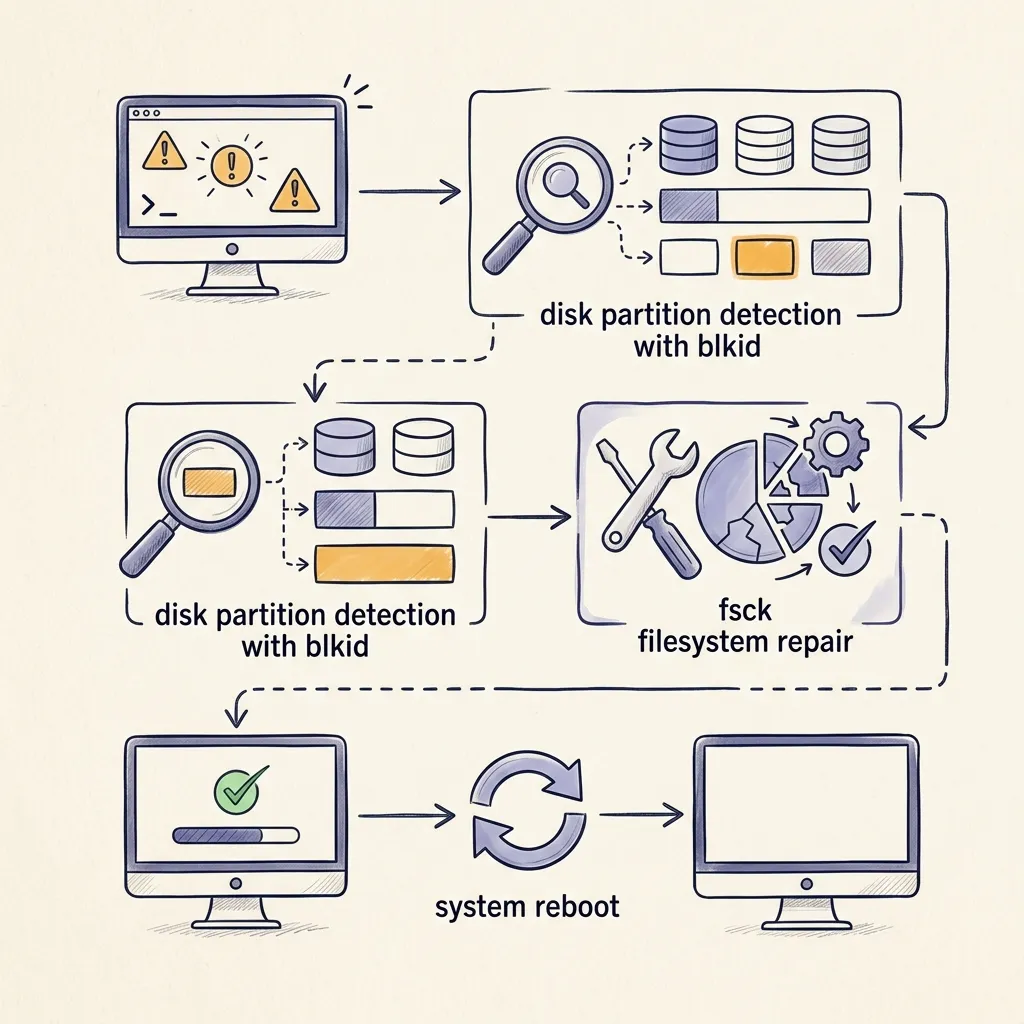
Step 1: Get your bearings
You’re in a minimal BusyBox shell. Most standard utilities are available but may have reduced functionality. Start by understanding your environment:
cat /proc/cmdlineExpected results: The kernel boot line, which includes a root=UUID=... or root=/dev/sdXN parameter. This tells you which partition the boot process is trying to mount as root.
Step 2: List and identify all storage devices
ls /dev/sd* /dev/nvme* /dev/mmcblk* 2>/dev/nullThen cross-reference with filesystem labels and UUIDs:
blkidMatch the root= value from Step 1 against the blkid output. If the UUID from root= doesn’t appear in blkid output at all, that’s your problem—the boot config references a partition that no longer exists or has been reformatted.
Expected results: You should see all your partitions listed with their UUIDs and filesystem types. The partition matching your root UUID is the one you’ll target for fsck if needed.
Step 3: Run fsck on the identified root partition
Once you’ve positively identified your root partition (let’s say /dev/sda2 for this example—substitute your actual device), and confirmed it is not mounted, run:
fsck -y /dev/sda2The -y flag answers “yes” to all repair prompts automatically. This is generally safe for routine corruption fixes, but only run this against the correct, unmounted partition.
Expected results: fsck runs through several phases (checking inodes, block bitmaps, directory structure, connectivity). It prints a summary like “X files, Y blocks, Z free” on success. If errors were found and fixed, you’ll see messages about corrected inconsistencies.
Step 4: Attempt to continue the boot
After fsck completes successfully:
exitOr equivalently:
bootThe initramfs scripts will attempt to resume the boot sequence. If the filesystem was the only problem, the system should now mount root and continue normally.
Expected results: The initramfs scripts retry mounting the root filesystem. If successful, you’ll see normal boot messages scrolling by and eventually reach the login screen or console.
Step 5: If boot still fails, reboot and repeat diagnosis
rebootNote: In some initramfs environments, reboot may not be available. If it isn’t, use the physical reset button or power-cycle the machine—but first, note any error messages you saw.
Expected results: The system restarts. Watch the early boot messages for clues about what’s failing (timeout waiting for root device, UUID not found, etc.).
What common mistakes should you avoid during initramfs repair?
- Don’t guess partition names. Running fsck on the wrong device can destroy a perfectly healthy filesystem. Always verify with
blkidandcat /proc/cmdlinefirst. - Don’t run fsck on a mounted filesystem. If the root partition is mounted (even read-only), unmount it first or boot from a live USB. Running fsck on a mounted filesystem can corrupt it further.
- Don’t remount root read-write to “fix things quickly.” If the boot scripts left it read-only, there’s a reason. Diagnose and fix the underlying issue first.
- Don’t skip checking which device actually holds your root filesystem. A reinstalled or repartitioned drive may have shifted device names (sda vs sdb). UUIDs, not device names, are reliable identifiers.
- Don’t reboot repeatedly without reading error messages. Each failed boot may print a different clue. Capture the text (photo with a phone if needed) before rebooting.
- **Don’t run dd, mkfs, or any formatting command unless you fully understand the consequences and have backups.
How do I repair the filesystem using fsck?
This section covers the most common fix: filesystem corruption on an ext2/ext3/ext4 root partition.
Why fsck fixes most initramfs drops
During boot, the initramfs scripts try to mount the root filesystem. If the filesystem’s journal indicates it wasn’t cleanly unmounted (e.g., after a sudden power loss or crash), the mount may fail or the kernel may refuse to proceed, dropping you to the initramfs prompt. Running fsck repairs the inconsistencies, allowing the mount to succeed.
The command
fsck -y /dev/sdXNReplace /dev/sdXN with your actual root partition (e.g., /dev/sda2, /dev/nvme0n1p3).
What the flags mean
| Flag | Purpose |
|---|---|
-y | Automatically answer “yes” to all repair questions. Recommended for interactive rescues to avoid the process halting mid-repair. |
-f | Force a check even if the filesystem is marked clean. Useful if you suspect subtle corruption. Add it if the first fsck pass reported the filesystem as clean but problems persist: fsck -fy /dev/sdXN. |
-n | Make no changes—read-only check. Use this first if you want to see what’s wrong without modifying anything: fsck -n /dev/sdXN. |
Reading the output
After fsck runs, it prints a summary line:
Clean exit, no errors: “/dev/sda2: X files, Y blocks, Z free” — Your filesystem was fine. The problem lies elsewhere (UUID mismatch, fstab issue, hardware). Move to the boot config section.
Errors found and corrected: Messages like “Inode NNN marked as in use but has zero dtime”, “Block bitmap differences found”, “Free blocks count wrong” followed by a corrected summary — The filesystem was repaired. Try booting with exit.
Errors found but not fully repairable: If fsck reports that it could not fix certain errors, or you see messages like “UNEXPECTED INCONSISTENCY” — Run fsck -fy for a forced, deeper check. If that still fails, you may need to boot from a live USB and run fsck from there, or consult the e2fsck man page for advanced options.
“Bad magic number in super-block”: This indicates the filesystem’s superblock is damaged. You can attempt to use a backup superblock:
e2fsck -b 32768 /dev/sdXNCommon backup superblock locations are 32768, 98304, 163840, 327680. The mke2fs -n /dev/sdXN command (run from a live USB) will list backup superblock locations without modifying anything.
Note: For modern ext4 filesystems, you may also need to specify the block size: e2fsck -b 32768 -B 4096 /dev/sdXN
Expected results after successful fsck: A clean summary line with file and block counts. Subsequent exit or boot resumes normal startup.
After fsck succeeds
Once fsck reports success and you’ve booted normally, it’s wise to:
- Check your drive’s health:
sudo smartctl -a /dev/sdX(install smartmontools if needed). - Review logs for what caused the dirty shutdown:
journalctl -b -1(previous boot’s logs) ordmesg | tail. - Ensure your system shuts down cleanly going forward (avoid hard power-offs).
How do I fix root= UUID boot configuration errors?
If fsck didn’t solve the problem—or if blkid showed that the UUID in your kernel boot line doesn’t match any existing partition—you likely have a boot configuration issue.
Understanding the boot parameter
When GRUB loads the kernel, it passes a parameter like root=UUID=a1b2c3d4-.... telling the initramfs which partition to mount as the root filesystem. If this UUID no longer matches your actual root partition—because you repartitioned, cloned the disk, or the partition table changed—the initramfs can’t find root and drops you to a prompt.
Check the current boot parameter
At the initramfs prompt:
cat /proc/cmdlineExpected results: A line showing the kernel command line, including root=UUID=... or root=/dev/sdXN. Note the UUID value.
Compare against actual devices
blkidCompare the root=UUID= value from /proc/cmdline against the UUIDs listed by blkid. If none match, the boot config is pointing to a nonexistent partition.
How to fix it
Fixing boot parameters typically requires editing GRUB configuration files, which are on the root filesystem. Since you’re in the initramfs, you’ll need to either:
Temporarily override the boot parameter: Reboot, and at the GRUB menu, press e to edit the boot entry. Find the line beginning with linux and change root=UUID=old-uuid to root=/dev/sdXN (using the actual device path from blkid). Press Ctrl+X or F10 to boot.
Boot from a live USB and chroot into your system to permanently fix /etc/fstab and GRUB configuration. This is the more robust approach.
Chroot method (from a live USB)
Boot from a Debian/Ubuntu live USB. Open a terminal:
sudo -i
lsblk
blkid
Identify your root partition (e.g., /dev/sda2) and EFI/boot partition if applicable (e.g., /dev/sda1). Mount root:
mount /dev/sda2 /mntMount the EFI partition if you use UEFI:
mount /dev/sda1 /mnt/boot/efiBind-mount essential virtual filesystems:
mount --bind /dev /mnt/dev
mount --bind /proc /mnt/proc
mount --bind /sys /mnt/sys
mount --bind /run /mnt/run
Chroot in:
chroot /mntNote: The for loop syntax may not work in all shell environments, so the explicit commands are safer.
Inside the chroot, check and fix /etc/fstab:
cat /etc/fstab
blkid
Ensure the UUID for / in /etc/fstab matches the actual UUID from blkid. Update if needed using a text editor like nano.
Then reinstall and update GRUB:
update-grub
grub-install /dev/sda
Note: If you use UEFI, grub-install targets the EFI partition (typically grub-install without a device argument, or grub-install --target=x86_64-efi). If you use legacy BIOS, target the disk device (e.g., /dev/sda, not a partition).
Exit and reboot:
exit
umount -R /mnt
reboot
Expected results: The system boots normally with the corrected UUID references in both the boot configuration and /etc/fstab.
Which initramfs boot error code matches your system?
| Symptom at initramfs | Likely Cause | Diagnostic Command | Fix |
|---|---|---|---|
| “ALERT! UUID=… does not exist” message | Wrong or stale UUID in boot params (root=UUID=) | blkid — compare UUIDs | Edit GRUB boot entry (e at GRUB menu) or fix /etc/fstab via live USB chroot |
| “fsck failed with exit code 4” or “Inconsistency” | Filesystem corruption on root partition | fsck -n /dev/sdXN (read-only check first) | fsck -y /dev/sdXN to repair, then exit |
| Root partition not listed in blkid | Storage controller driver not loaded, or disk failure | cat /proc/partitions, `dmesg | grep -i ‘ata |
| “unable to mount root fs on unknown-block” | Kernel can’t find the root device (missing driver or wrong device path) | cat /proc/cmdline, ls /dev/sd* /dev/nvme* | Verify device naming; fix boot parameter; ensure proper initramfs drivers are included (update-initramfs) |
| “Run fsck manually” (journal replay failed) | ext4 journal is corrupted or dirty | fsck -fy /dev/sdXN | Repair filesystem; if journal is irreparable, try tune2fs -O ^has_journal /dev/sdXN then e2fsck -fy, then tune2fs -j /dev/sdXN to recreate the journal. Warning: Journal recreation is advanced—backup first. |
| /etc/fstab references wrong UUID | Partition was reformatted or cloned, changing the UUID | cat /etc/fstab (mount root read-only or via live USB) | Update /etc/fstab with correct UUID from blkid |
| Boot hangs before reaching initramfs | GRUB itself may be damaged or bootloader issue | Boot from live USB, inspect with fdisk -l and grub-install | Reinstall GRUB from a chroot environment |
| “mount: mounting /dev/sdXN on /root failed: Device or resource busy” | Partition is partially mounted or locked | `mount | grep sdXN` |
How does initramfs recovery differ on desktop vs server?
The rescue process from the initramfs prompt is essentially identical regardless of whether you’re on a desktop or server. However, there are practical differences in how you interact with the system:
Desktop users
- You may see a brief splash screen or logo before being dropped to the initramfs prompt. If you see only a black screen (no text at all), the display may have switched to a different resolution or the framebuffer may have failed. Try pressing
EscorCtrl+Alt+F1throughCtrl+Alt+F6to access a text console. - If the GRUB menu doesn’t appear on boot, hold
Shift(BIOS) or tapEscrepeatedly (UEFI) during early boot to force it to show. - You can easily boot from a USB flash drive using a live image for rescue operations.
Server users
- On headless servers, you’ll rely on serial console access (e.g., via IPMI, iLO, or a serial-over-LAN connection) or a virtual console (in virtualized environments). Ensure your terminal emulator is configured for the correct baud rate (commonly 115200 or 9600) if serial console is enabled.
- If the server drops to initramfs but you’re connected via SSH only, you’ll lose connectivity at that point—SSH isn’t available in the initramfs environment. Physical or out-of-band management access is necessary.
- The initramfs prompt environment is the same BusyBox shell regardless of platform. Package management tools (apt, dpkg) are not available in the initramfs—don’t attempt to install packages from there. Any package-level repair must be done after booting from a live USB or rescue media.
Frequently Asked Questions (FAQ)
What does the initramfs prompt mean?
The initramfs prompt means the boot process couldn’t complete its job of mounting your root filesystem and handing control to the operating system. The initramfs is a tiny temporary environment in RAM. You land at its prompt when something prevents the transition to the full system—most commonly a filesystem consistency check failure or an incorrect root partition reference.
Is it safe to run fsck from the initramfs prompt?
Yes, fsck is safe to run from the initramfs prompt as long as the target filesystem is not mounted. In the typical initramfs scenario, the root filesystem hasn’t been mounted yet, so it’s safe. Always verify with mount | grep sdXN before running fsck. If the partition shows as mounted, unmount it first or use a live USB.
Can I fix initramfs without losing data?
In most cases, yes. The most common fix—running fsck to repair filesystem corruption—does not delete user data. It repairs metadata inconsistencies (inodes, block bitmaps, directory entries). In rare cases of severe corruption, fsck may move orphaned files to a lost+found directory on the partition. Your files should still be there after repair.
What does fsck -y do?
The -y flag tells fsck to automatically answer “yes” to all repair questions. Without it, fsck pauses at each inconsistency it finds and asks whether to fix it—there can be dozens of prompts. Using -y is standard practice for rescue operations because it ensures the full repair completes without intervention.
How do I know which partition to run fsck on?
Check the kernel boot parameter to see which partition the system is trying to use as root:
cat /proc/cmdlineLook for the root=UUID=... value. Then cross-reference with:
blkidFind the device whose UUID matches. That’s your root partition. Alternatively, you can often infer the root partition from size and filesystem type shown in cat /proc/partitions and blkid output.
What if blkid shows no partitions at all?
If blkid returns nothing and cat /proc/partitions shows no block devices, the kernel can’t see your storage hardware. This could mean a missing driver in the initramfs, a loose cable, a failed controller, or a dead drive. Check dmesg for hardware-related errors:
dmesg | grep -iE 'ata|scsi|nvme|error|fail'This may reveal timeout messages or controller errors indicating hardware trouble.
What causes the “you are in emergency mode” message?
On systems with systemd (which includes modern Ubuntu and Debian), “you are in emergency mode” is a related but slightly different failure than the raw initramfs prompt. Emergency mode means the initramfs successfully handed off to the system, but systemd then encountered a critical failure—typically a mount failure defined in /etc/fstab or a failed dependency. The diagnostic steps are similar: check /etc/fstab for incorrect UUIDs, run fsck on the problematic partition, and review journalctl -xb for details about what triggered emergency mode.
How do I prevent this from happening again?
Most initramfs drops stem from unclean shutdowns (power loss, hard reset) or failing storage. To reduce the risk: enable fsck.mode=force periodically, ensure your system performs clean shutdowns, monitor SMART health with smartmontools (smartctl -a /dev/sdX), and keep backups. If your initramfs is missing drivers for your storage controller (common after hardware changes or kernel updates), run sudo update-initramfs -u -k all from a working session to rebuild it with all available modules.
Can I boot into a recovery mode instead of the initramfs?
Yes. At the GRUB menu, select “Advanced options for Ubuntu” (or Debian), then choose a recovery mode or older kernel entry. Recovery mode boots into a more capable environment than the raw initramfs prompt—it includes more tools and a menu with options like fsck, root (drop to root shell), and network. If the GRUB menu doesn’t appear, hold Shift (BIOS) or tap Esc (UEFI) during early boot.
Should I reinstall the OS to fix initramfs?
Almost never. The vast majority of initramfs boot failures are fixable with fsck or boot parameter corrections. Reinstalling would overwrite your data unnecessarily. Always exhaust the rescue steps in this guide first. Only consider reinstalling if storage diagnostics confirm the drive itself is physically failing and you’ve already recovered your data.
What is the complete initramfs recovery checklist?
- Stay calm and read the screen. Note any error message before doing anything.
- Identify your root partition. Run
cat /proc/cmdlineandblkid. Match theroot=UUID=value. - Confirm the partition is unmounted. Run
mount | grep sdXN. Unmount if necessary. - Run fsck on the correct partition.
fsck -y /dev/sdXN(use your actual device path). - Attempt to boot. Type
exitorboot. - If it still fails, check whether the UUID in
/proc/cmdlinematches blkid output. Fix via GRUB edit or live USB chroot. - If the disk isn’t visible at all, check hardware connections and dmesg for controller errors.
- After successful boot, check SMART health and review logs to understand what caused the failure.
- Back up your data if you haven’t already—this drive gave you a warning sign.
Summary: Rescuing Debian & Ubuntu from initramfs
Finding yourself at an initramfs prompt is stressful, but it’s usually fixable. The most common cause is filesystem corruption, which fsck can repair. When that doesn’t work, it’s often a UUID mismatch in your boot configuration—something that can happen after repartitioning or disk cloning.
The key is to diagnose carefully: identify your root partition, verify it’s unmounted, run fsck if appropriate, and only then attempt more complex boot config repairs. Most initramfs failures don’t require reinstalling—the system just needs help finding its way home. Take your time, read the error messages, and don’t panic.
Read next: